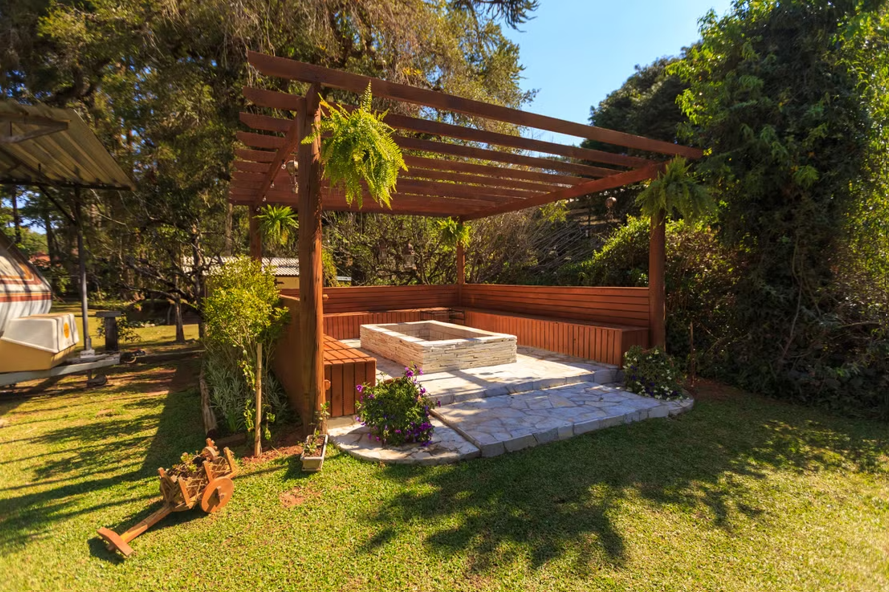
A pergola changes the way you use outdoor space. It adds shade, structure, and a clear reason to spend time outside, something a few potted plants and a patio chair rarely manage on their own. Building one from scratch is well within reach for a confident DIYer, and it tends to cost a fraction of what a contractor would charge for the same result.
That said, a pergola is a structural project, not a furniture assembly. Getting the planning, materials, and fasteners right from the start saves a lot of grief down the road.
Start With a Plan, Not Just an Idea
Before ordering lumber, nail down the basics: where the pergola will sit, how large it needs to be, and whether it will be freestanding or attached to the house. An attached pergola shares a ledger board with your exterior wall, which simplifies the footprint but adds complexity to the connection point. Freestanding designs are more flexible but need four solid posts anchored to the ground or an existing patio surface.
Check Permits Before You Dig
Many municipalities require a permit for any permanent outdoor structure above a certain size, typically around 200 square feet. It is worth a quick call to your local building department before breaking ground. At this stage, also think about fasteners. The post-to-beam connections in a pergola carry real load, and standard screws are not appropriate for them. Lag screws are the standard choice for these structural joints, they are threaded along the shank and designed to hold wood-to-wood connections under sustained load and outdoor exposure.
Choosing Lumber and Hardware
Cedar is the most popular choice for pergolas. It is naturally resistant to rot and insects, it takes stain well, and it does not warp as aggressively as pine when exposed to seasonal moisture changes. Pressure-treated lumber costs less and offers good durability, but it needs time to dry before staining and can be heavier to work with. Either way, use only wood rated for exterior use.
Post and Beam Sizing
For a standard backyard pergola in the 10-by-12-foot range, 4×4 posts are adequate if the structure is under eight feet tall. Go taller or wider and 6×6 posts give a more proportional look and better stability. Beams typically run as doubled 2x8s or 2x10s spanning between the posts, with 2×6 rafters laid across them at even spacing. The spacing of the rafters affects both shade and the visual weight of the finished structure, closer spacing reads as more solid, wider spacing feels lighter and more open.
Building the Structure
Set the posts first. For ground-mounted posts, dig holes below the frost line for your region and use concrete to secure the post bases. On an existing concrete patio, surface-mount post bases anchor directly to the slab with concrete screws. Either way, check for plumb before the concrete sets, adjustments after the fact are unpleasant.
Once the posts are set and cured, install the beams. This is where structural fasteners matter most. Star Fasteners Plus recommends using appropriately sized lag screws driven through the beam and into the post, with a washer under the head to distribute the load. Pre-drill to avoid splitting the wood, and use two fasteners per connection point to prevent any rotation under load.
Rafters go on last. They can sit in metal joist hangers or be notched to rest on top of the beam — both methods work, though notching gives a cleaner look. Space them evenly across the span and toe-screw each one to keep them from shifting.
Finishing and Maintenance
Sand any rough edges and apply a UV-resistant exterior stain or sealer before the wood weathers. Cedar in particular benefits from an initial coat applied within a few weeks of installation, while the wood is still clean and dry. For guidance on wood finishing and preservative selection suited to outdoor structures, the American Wood Council publishes technical resources on lumber performance and treatment standards that are worth consulting before making finish choices.
Plan on reapplying the finish every two to three years, depending on your climate and how much direct sun the structure gets. Beyond that, a pergola is low maintenance; occasional checks on the post bases and connection hardware are usually all it takes to keep the structure solid for years.
 Interior Styling Consultant
Agnes Pakenzone has opinions about room-specific cleaning techniques. Informed ones, backed by real experience — but opinions nonetheless, and they doesn't try to disguise them as neutral observation. They thinks a lot of what gets written about Room-Specific Cleaning Techniques, Home Care Strategies and Fixes, Interior Styling Ideas and Trends is either too cautious to be useful or too confident to be credible, and they's work tends to sit deliberately in the space between those two failure modes.
Reading Agnes's pieces, you get the sense of someone who has thought about this stuff seriously and arrived at actual conclusions — not just collected a range of perspectives and declined to pick one. That can be uncomfortable when they lands on something you disagree with. It's also why the writing is worth engaging with. Agnes isn't interested in telling people what they want to hear. They is interested in telling them what they actually thinks, with enough reasoning behind it that you can push back if you want to. That kind of intellectual honesty is rarer than it should be.
What Agnes is best at is the moment when a familiar topic reveals something unexpected — when the conventional wisdom turns out to be slightly off, or when a small shift in framing changes everything. They finds those moments consistently, which is why they's work tends to generate real discussion rather than just passive agreement.
Interior Styling Consultant
Agnes Pakenzone has opinions about room-specific cleaning techniques. Informed ones, backed by real experience — but opinions nonetheless, and they doesn't try to disguise them as neutral observation. They thinks a lot of what gets written about Room-Specific Cleaning Techniques, Home Care Strategies and Fixes, Interior Styling Ideas and Trends is either too cautious to be useful or too confident to be credible, and they's work tends to sit deliberately in the space between those two failure modes.
Reading Agnes's pieces, you get the sense of someone who has thought about this stuff seriously and arrived at actual conclusions — not just collected a range of perspectives and declined to pick one. That can be uncomfortable when they lands on something you disagree with. It's also why the writing is worth engaging with. Agnes isn't interested in telling people what they want to hear. They is interested in telling them what they actually thinks, with enough reasoning behind it that you can push back if you want to. That kind of intellectual honesty is rarer than it should be.
What Agnes is best at is the moment when a familiar topic reveals something unexpected — when the conventional wisdom turns out to be slightly off, or when a small shift in framing changes everything. They finds those moments consistently, which is why they's work tends to generate real discussion rather than just passive agreement.